
Print bed adhesion is one of the most common, and most fixable, problems in 3D printing. A print that detaches mid-job, warps at the corners, or lays down a messy first layer almost always traces back to three things: a dirty bed, a poorly calibrated nozzle height, or the wrong surface for your filament. The fix rarely requires new hardware. Most of the time, it’s just about going back to the basics.
Clean your bed like you really mean it
Oils from your fingerprints, dust, and leftover residue from previous prints create an invisible barrier between the filament and the surface. You can’t always see it, but it’s there, and it’s enough to ruin adhesion on an otherwise perfect print.
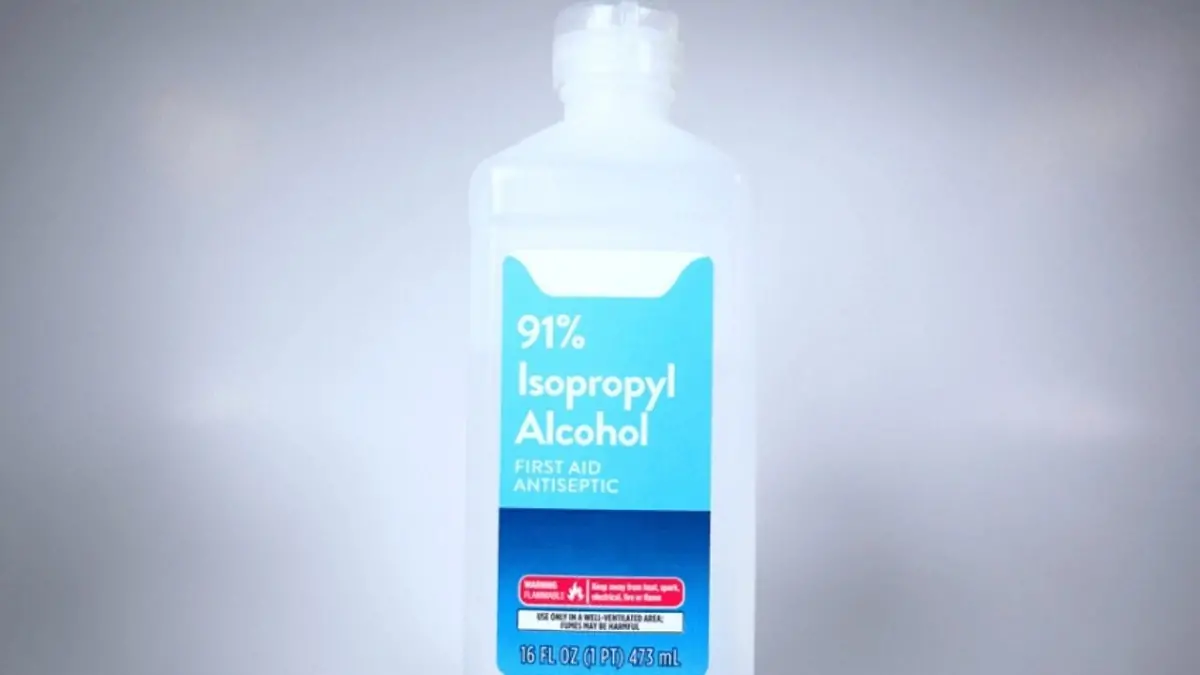
Wipe the bed with isopropyl alcohol before every single print. Use IPA at 90% concentration or higher; lower concentrations have too much water content and don’t cut through grease as effectively. A lint-free cloth or a paper towel works fine. For tougher residue that won’t come off with a quick wipe, warm soapy water or a small amount of acetone does the job, just rinse thoroughly and let the surface dry completely before printing.
One thing that’s easy to forget: after cleaning, don’t touch the bed with your bare hands. Fingerprint oils transfer instantly and undo the cleaning in seconds. This 15-second step before every print eliminates one of the biggest variables in first-layer failure, and once it becomes habit, you’ll wonder how you ever printed without it.
Dial in your bed level and Z-Offset
A clean bed won’t save you if the nozzle isn’t at the right height. Bed leveling and Z-offset are two separate adjustments that work together, and getting both right is essential.
Bed leveling ensures the build surface is uniformly parallel to the nozzle across the entire print area. If any corner is off, the nozzle will be too close on one side and too far on the other, causing uneven adhesion or outright failure. The Z-offset fine-tunes the exact distance between the nozzle tip and the bed surface. Too high, and the filament won’t bond; too low, and it gets squished flat and can clog or damage the surface.
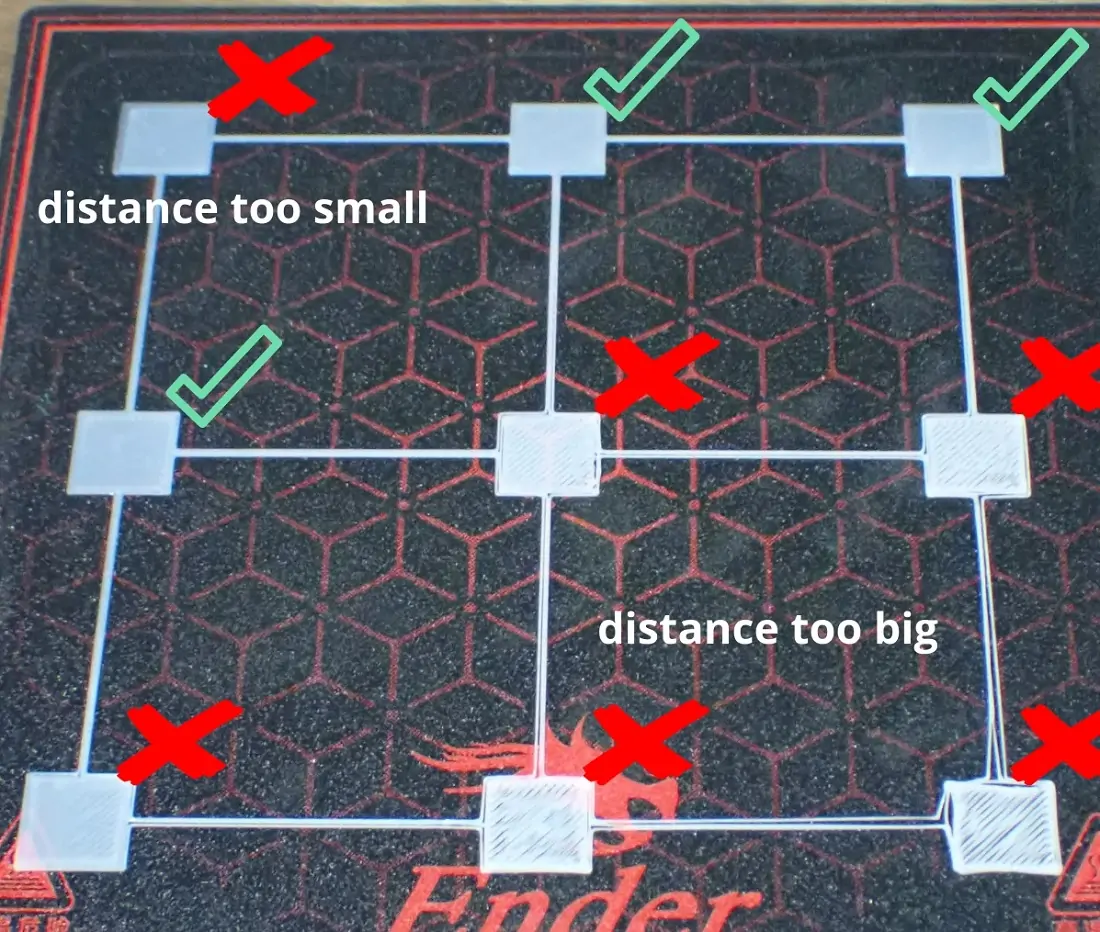
When the Z-offset is correct, the first layer lines look flat, slightly pressed into the bed, and connect cleanly to each other. When it’s off, you’ll see gaps between lines, filament that peels off easily, or thin round strands that look like spaghetti laid on a plate. If anything looks wrong during the first layer, stop the print immediately and adjust, there’s no point letting it run for hours on a bad foundation.
It also helps to slow down the first layer speed in your slicer. Printing between 15 and 30 mm/s gives the filament more time to bond with the surface before the next layer starts building on top of it.
Pick the right temperatures and surface for your filament
Not every bed surface works equally well with every material, and mismatching the two is a fast track to adhesion problems.
PEI-coated plates are the most popular choice for a reason, they grip well when heated and release cleanly once the bed cools down, making print removal easy without tools.
They work well with PLA, PETG, and many other common filaments. Glass beds produce a smooth, glossy bottom surface but typically need a glue stick or tape to provide enough grip. Powder-coated spring steel and BuildTak surfaces offer strong mechanical adhesion and are good options depending on your printer and filament combination.
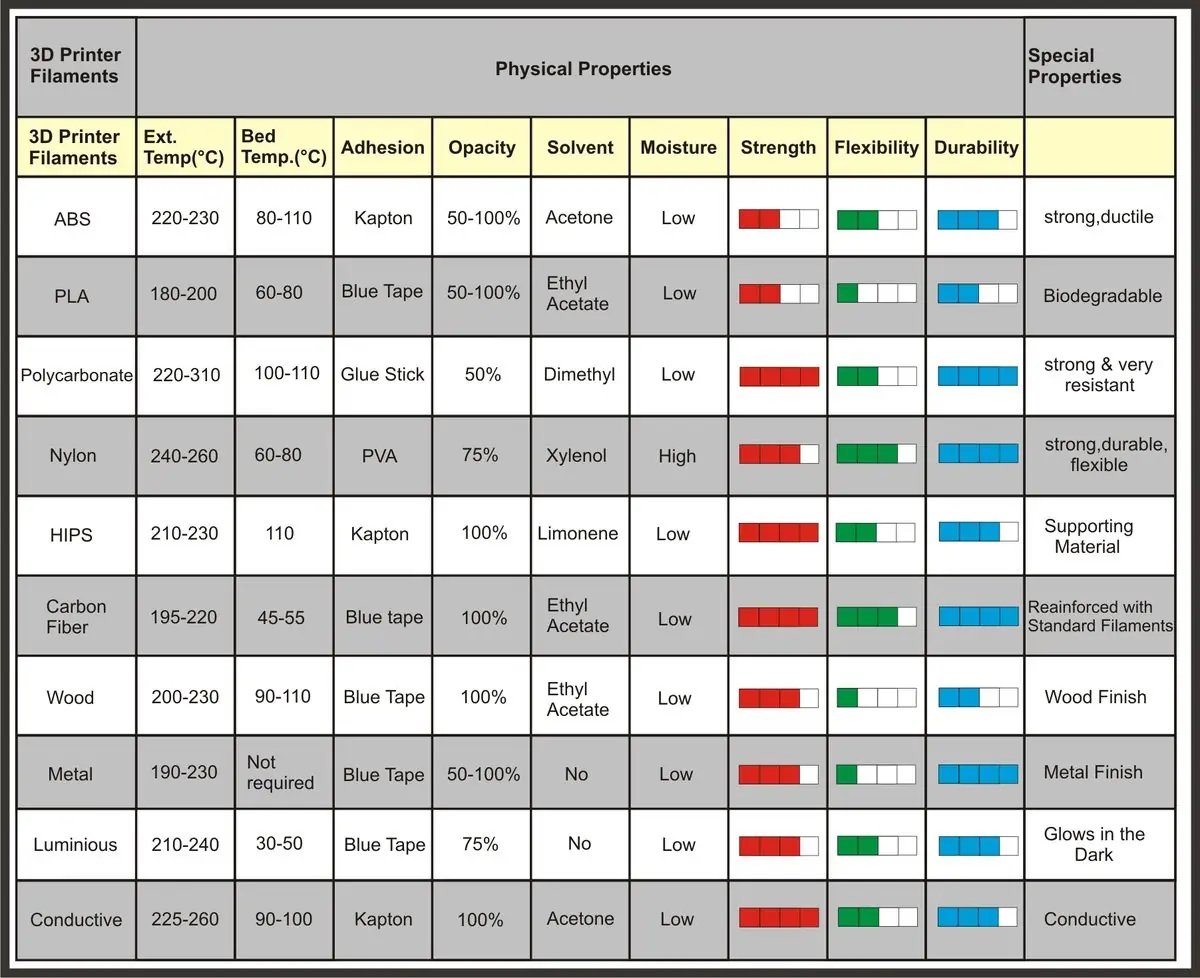
For PLA, set the bed temperature between 50 and 60°C. For PETG, aim for 70 to 90°C. If the first layer still isn’t sticking, raise the temperature in 5°C increments until it does.
A glue stick or hairspray adds extra grip when you need it, particularly for prints with a small contact footprint. Adding a brim in your slicer is another easy win, it increases the surface area touching the bed and helps anchor the print during those critical first layers.
For materials like ABS that are prone to warping, a heated bed isn’t optional. Without it, the bottom layers cool and contract too quickly, pulling the edges up off the surface. A properly heated bed keeps the base at a stable temperature throughout the print and prevents that from happening.
Most first-layer problems have a straightforward solution. Keep the bed clean, get the nozzle height right, and match your surface to your filament, and failed prints will become the exception, not the rule.
Had a bed adhesion nightmare that tested your patience? Drop a comment and tell us what finally fixed it, we’d love to hear your war stories!